Siser Glitter HTV Instructions: A Comprehensive Guide
Navigating Siser Glitter HTV requires precision! This guide details cut settings for Cricut‚ Silhouette‚ ScanNCut‚ and Graphtec‚ ensuring successful‚ sparkling projects․
Understanding Siser Glitter HTV

Siser Glitter HTV stands out due to its vibrant‚ eye-catching sparkle‚ making it ideal for personalized apparel and crafts․ However‚ its unique composition—containing flecks of glitter—demands specific cutting and application techniques․ Unlike standard HTV‚ glitter vinyl is often thicker‚ necessitating increased blade depth and force settings on cutting machines like Cricut‚ Silhouette‚ ScanNCut‚ and Graphtec․
Successful projects hinge on precise test cuts and understanding that settings may vary slightly based on the specific glitter HTV type and blade condition․ Always prioritize a sacrificial test cut to avoid wasting valuable material․
What is Siser Glitter HTV?
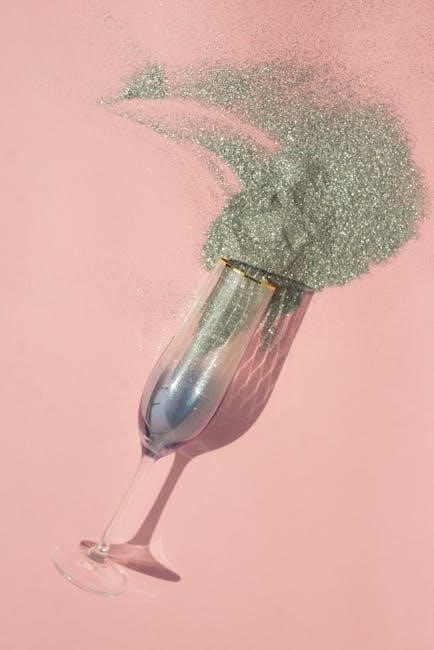
Siser Glitter HTV is a premium heat transfer vinyl celebrated for its dazzling‚ shimmering finish․ It’s a polyurethane (PU) material embedded with fine glitter particles‚ offering a luxurious look for custom designs․ Available in a wide spectrum of colors‚ it’s perfect for adding a touch of glamour to t-shirts‚ hoodies‚ bags‚ and more․
While visually striking‚ glitter HTV differs from standard HTV in thickness and requires adjusted cutting settings․ Siser offers various glitter options‚ including Easyweed Glitter‚ each with slightly different characteristics․
Key Features and Benefits
Siser Glitter HTV boasts exceptional sparkle and durability‚ making it ideal for eye-catching apparel․ Its PU composition ensures a soft‚ flexible feel‚ even after heat pressing․ The vibrant color range allows for creative expression‚ while its compatibility with various cutting machines simplifies the design process․
Benefits include a professional-looking finish‚ long-lasting adhesion‚ and resistance to fading and peeling․ Glitter HTV elevates projects‚ adding a premium touch that standard vinyl cannot replicate‚ enhancing the overall aesthetic appeal․
Tools and Materials Needed
Essential tools for working with Siser Glitter HTV include a cutting machine (Cricut‚ Silhouette‚ ScanNCut‚ or Graphtec) and appropriate cutting mats for secure vinyl placement․ Weeding tools are crucial for removing excess material post-cutting‚ ensuring clean designs․ A heat press or household iron is necessary for adhering the HTV to fabric․
Furthermore‚ a Teflon sheet or parchment paper protects both the design and your heat source during pressing․ Having a test piece of vinyl available is highly recommended for perfecting cut settings before committing to your final project․
Cutting Machines (Cricut‚ Silhouette‚ ScanNCut‚ Graphtec)
Siser Glitter HTV is compatible with a variety of cutting machines․ Cricut‚ Silhouette Cameo‚ ScanNCut‚ and Graphtec machines all offer settings suitable for this material․ However‚ achieving optimal cuts requires understanding each machine’s nuances; Blade depth and force adjustments are key‚ as glitter HTV is often thicker than standard vinyl․
Remember that settings can vary based on blade age and vinyl batch․ Always perform a test cut to confirm proper settings before cutting your full design‚ preventing wasted material and ensuring clean cuts․
Cutting Mats
Selecting the right cutting mat is crucial for Siser Glitter HTV․ A standard grip mat generally works well‚ providing sufficient tackiness to hold the material securely without damaging it․ However‚ for heavily glittered HTV‚ a light grip mat might be preferable to prevent tearing during removal․
Ensure your mat is clean and free of debris for optimal adhesion․ Regularly cleaning or replacing your mat maintains its stickiness‚ guaranteeing accurate cuts and preventing frustrating slippage during the cutting process․
Weeding Tools
Effective weeding is essential with Siser Glitter HTV due to its intricate nature․ A hook-style weeding tool is paramount for precisely removing excess vinyl‚ especially within detailed designs․ A bright light box or illuminated mat significantly aids visibility‚ highlighting cut lines for cleaner weeding․
Consider using a spatula tool for larger areas or stubborn pieces․ Patience and a steady hand are key; rushing can lead to accidental removal of desired elements․
Heat Press or Iron
Achieving a lasting bond with Siser Glitter HTV demands appropriate heat application․ A heat press provides consistent temperature and pressure‚ yielding professional results․ However‚ a household iron can serve as an alternative‚ though requiring more attention to detail․
Ensure your heat press or iron is clean and free of debris․ Utilizing a Teflon sheet or parchment paper is crucial to protect both the HTV and your heating surface during application‚ preventing sticking or damage․
Teflon Sheet or Parchment Paper
Protecting your project and equipment is paramount when working with Siser Glitter HTV․ A Teflon sheet or parchment paper acts as a vital barrier between the HTV‚ your garment‚ and the heat source – be it a heat press or iron․ This prevents the glitter from adhering directly to the platen or iron surface․
Using either material ensures even heat distribution and prevents scorching or melting of the HTV’s adhesive․ Reusable Teflon sheets offer longevity‚ while parchment paper is a cost-effective disposable option․

Cutting Settings for Siser Glitter HTV
Achieving a clean cut is crucial for successful weeding and application of Siser Glitter HTV․ Settings vary based on your cutting machine․ For Cricut‚ use a standard blade and “Iron-On” setting․ Silhouette Cameo requires blade 3‚ speed 8‚ and force 6 with “Heat Transfer‚ Smooth” material selected․ ScanNCut utilizes blade 2‚ speed 1‚ and pressure 1․

Graphtec machines benefit from a 45-gram blade‚ force 8-9‚ and a speed of 30 cm/s․ Remember‚ these are starting points; a test cut is always recommended!
Cricut Cut Settings

For Cricut machines working with Siser Glitter HTV‚ begin with a standard blade․ Select the “Iron-On” material setting within Cricut Design Space․ Depth settings often range around 2‚ with force between 12-14 for Siser Easyweed‚ HTVRont‚ or Star Vinyl․ Newer auto blades may require slightly increased force․
Glitter vinyl‚ being thicker‚ necessitates increased depth and force․ Always perform a small test cut – a tiny star at the mat’s edge is ideal – to confirm optimal settings before committing to your full design․
Silhouette Cameo Cut Settings
When utilizing a Silhouette Cameo with Siser Glitter HTV‚ employ a standard blade․ Within Silhouette Studio‚ select “Heat Transfer‚ Smooth” as your material type․ Recommended settings typically involve a speed of 8 and a force of 6․ However‚ glitter HTV’s density demands adjustments․
Similar to Cricut‚ a test cut is crucial․ Begin with the suggested settings and incrementally increase force if the vinyl doesn’t cut cleanly through․ Remember‚ a small test shape prevents wasted material and ensures a perfect cut․
ScanNCut Cut Settings
For optimal results with your ScanNCut and Siser Glitter HTV‚ utilize a standard blade‚ setting it to a depth of 2․ Employ a cut speed of 1 and a cut pressure of 1 as a starting point․ Glitter vinyl’s thicker composition often necessitates adjustments․
Always prioritize a test cut to confirm these settings are sufficient․ Increase cut pressure incrementally if the glitter HTV isn’t fully cut through․ Consistent testing ensures a clean‚ professional finish for your projects․
Graphtec Cut Settings
Achieving clean cuts with Siser Glitter HTV on a Graphtec machine requires specific settings․ Utilize a 45-gram blade and apply a force between 8 and 9․ Employ tool CB09U0 and set the cutting speed to 30 cm/s as a foundational starting point․
Remember‚ glitter vinyl’s density often demands increased force․ Always perform a test cut to verify complete penetration․ Adjust the force incrementally until a clean cut is achieved‚ ensuring a flawless final product․
Preparing Your Design
Before cutting Siser Glitter HTV‚ meticulous design preparation is crucial for success․ Begin by carefully selecting or creating your desired artwork within your chosen design software․ Consider the intricacy of the design; finer details may require adjustments to cut settings․
Crucially‚ always remember to mirror your design before cutting! This ensures the image appears correctly when heat pressed onto your chosen material․ Proper preparation minimizes errors and maximizes project outcomes․
Design Software Considerations
Selecting the right design software impacts your Siser Glitter HTV project․ Programs like Cricut Design Space‚ Silhouette Studio‚ and ScanNCut Canvas offer varying features and compatibility․ Understanding your software’s capabilities is key to optimizing designs for cutting․
Consider vector-based programs for scalability without loss of quality․ Always check for software updates to ensure compatibility with the latest HTV profiles․ Test cuts are vital‚ as software settings are approximate and material variations exist․
Mirroring Your Design
Crucially‚ always mirror your design before cutting Siser Glitter HTV! This ensures the image transfers correctly onto your chosen fabric․ Most design software features a “mirror” or “flip horizontal” option․ Double-check this setting before sending the design to your cutting machine – a forgotten mirror can ruin your project․
Visual confirmation is recommended; preview the mirrored image to verify it appears as desired․ This simple step prevents frustrating errors and guarantees a professional-looking final product․
Cutting the Siser Glitter HTV
Precise cutting is vital for Siser Glitter HTV’s success․ Load your prepared‚ mirrored design onto the appropriate cutting mat‚ ensuring it adheres smoothly․ Carefully adjust blade depth and force based on your machine and material – test cuts are essential! Start with recommended settings (Cricut: Iron-on‚ Silhouette: Heat Transfer‚ Smooth)․
Monitor the initial cut; if it doesn’t penetrate fully‚ re-run the cut or slightly increase force․ Avoid cutting through the carrier sheet entirely‚ as this hinders weeding․
Loading the Mat
Proper mat loading ensures a clean cut․ Gently adhere the Siser Glitter HTV‚ carrier sheet side down‚ onto your cutting mat․ Ensure the vinyl lies flat‚ free of bubbles or wrinkles‚ for optimal tracking․ Align the mat carefully with the guides on your cutting machine – precise alignment is crucial for accurate design replication․
Securely load the mat‚ following your machine’s specific instructions․ Double-check that the mat is firmly in place before initiating the cutting process to prevent shifting during operation․
Adjusting Blade Depth and Force
Precise blade settings are vital for glitter HTV․ Due to its thickness‚ glitter vinyl generally requires increased depth and force compared to standard HTV․ Start with recommended settings – Cricut’s standard blade‚ Silhouette’s blade setting of 3‚ or ScanNCut’s blade depth of 2․
However‚ always perform a test cut! Adjust depth (between 2-3) and force (12-14) incrementally until the blade cleanly cuts through the vinyl‚ but not the carrier sheet․ A tiny star test cut is highly recommended․
Performing a Test Cut
A test cut is non-negotiable with glitter HTV! Before committing to your full design‚ utilize a small shape – a star is ideal – placed discreetly on your material․ This verifies your blade depth and force settings are optimal․ Run the test cut and carefully examine the results․
If the vinyl isn’t cut through‚ re-run the cut․ Never unload the mat prematurely! If it cuts too deeply‚ reducing force is necessary․ A sacrificial test piece prevents wasting your primary material․
Weeding the Design
Careful weeding is crucial for glitter HTV’s intricate details․ Begin by identifying your cut lines – the areas where the blade separated the design from the carrier sheet․ Utilize weeding tools‚ like hooks‚ to gently lift away the excess vinyl․ Patience is key‚ especially with complex designs․
Work slowly and methodically‚ supporting the vinyl to prevent tearing․ Glitter HTV can be more challenging to weed than standard vinyl‚ so take your time and ensure clean removal․
Identifying Cut Lines
Precisely locating cut lines is the first step in successful weeding․ Examine your Siser Glitter HTV sheet closely after cutting․ The blade should have cleanly separated the design elements from the surrounding carrier sheet; Look for the subtle indentations created during the cutting process․

These lines define the boundaries of your design․ A well-executed cut will make these lines readily visible‚ simplifying the weeding process․ If lines are faint‚ a bright light can help!
Using Weeding Tools Effectively
Mastering weeding tools is crucial for intricate Siser Glitter HTV designs․ Start with a sharp weeding hook‚ gently piercing the carrier sheet outside the design’s cut lines․ Slowly lift away the excess vinyl‚ maintaining a consistent angle; For detailed areas‚ utilize a pointed weeding tool for precision․
Avoid forcing the tool; let it glide along the cut lines․ Patience is key! Regularly clean your tools to maintain sharpness and prevent snagging․

Dealing with Intricate Designs
Intricate Siser Glitter HTV designs demand a slower‚ more deliberate weeding approach․ Begin by focusing on the interior details‚ carefully removing small pieces with a pointed weeding tool․ Employ a “pinning” technique – pierce the vinyl around delicate elements to stabilize them during removal․
Consider a light box for enhanced visibility․ Frequent‚ small cuts are preferable to large‚ forceful pulls‚ minimizing the risk of tearing․ Patience truly is paramount!
Heat Pressing Instructions
Achieving a flawless bond with Siser Glitter HTV hinges on precise heat application․ Generally‚ set your heat press to 305°F (152°C) for 10-15 seconds with medium pressure․ Always utilize a Teflon sheet or parchment paper to protect both your garment and the HTV’s glitter finish․
Ensure even heat distribution across the entire design․ A firm‚ consistent press is crucial for optimal adhesion․ Allow the design to cool completely before peeling – a cold peel is typically recommended for glitter HTV․
Temperature and Time Settings
Optimal heat application is paramount for Siser Glitter HTV’s longevity․ A recommended temperature range is 305°F (152°C) to 315°F (157°C)․ Pressing time typically falls between 10 to 15 seconds‚ but can vary based on the fabric type and press pressure․
Always prioritize a test press on a scrap piece of fabric to confirm settings․ Insufficient heat or time can lead to peeling‚ while excessive heat may scorch the material․ Consistent settings yield the best results․
Pressure Application
Consistent‚ firm pressure is crucial when heat pressing Siser Glitter HTV․ Aim for a medium to firm pressure – not so light that the HTV doesn’t adhere‚ but not so heavy that it distorts the design or damages the base material․
Ensure even distribution of pressure across the entire design․ A quality heat press provides uniform heat and pressure․ For irons‚ apply significant downward force and move slowly and deliberately across the design․
Using a Teflon Sheet
A Teflon sheet‚ or parchment paper‚ is essential for protecting both your heat press and your Siser Glitter HTV design․ Place the sheet directly over the transferred design before applying heat․ This prevents the glitter from sticking to the upper platen of your heat press‚ ensuring a clean release and preventing damage․
It also safeguards the glitter itself‚ maintaining its sparkle and preventing melting or distortion during the heat pressing process․ Replace the sheet as needed․
Ironing Instructions (Alternative to Heat Press)
While a heat press is recommended‚ ironing can work for smaller Siser Glitter HTV projects․ Set your iron to the cotton or linen setting – a high‚ dry heat is crucial․ Avoid steam! Place the Teflon sheet over your design and apply firm‚ even pressure‚ moving the iron slowly across the entire surface․
Check for adhesion; repeat in sections if needed․ Ensure complete coverage for a lasting bond‚ but be mindful of potential scorching․
Iron Temperature Settings
For successful ironing of Siser Glitter HTV‚ temperature is key․ Aim for the cotton or linen setting on your iron – this typically equates to around 300-330°F (149-166°C)․ Crucially‚ disable any steam function! Steam can hinder proper adhesion and potentially damage the glitter finish․
Always test a small‚ inconspicuous area first to confirm the setting doesn’t scorch your fabric․ Consistent heat is vital for a secure bond․
Applying Even Pressure
Consistent‚ firm pressure is paramount when ironing Siser Glitter HTV․ Avoid sliding the iron back and forth; instead‚ use a pressing motion‚ applying your full weight directly onto the Teflon sheet covering the design․ Focus on each section for the recommended time – typically 15-30 seconds – ensuring complete contact․
Uneven pressure results in poor adhesion․ A firm‚ steady press guarantees the glitter adheres beautifully and withstands washes‚ preserving your sparkling creation’s longevity․
Protecting the Design
After heat pressing‚ allow the design to cool completely before peeling the carrier sheet․ This cooling period is crucial for optimal adhesion of the Siser Glitter HTV․ Always use a Teflon sheet or parchment paper during pressing to shield the glitter from direct heat‚ preventing melting or distortion․
For enhanced durability‚ turn garments inside out for washing and avoid harsh detergents or bleach․ Gentle cycles and low heat drying will preserve the sparkle and vibrancy of your design for years to come․
Troubleshooting Common Issues
If HTV isn’t sticking‚ increase heat or pressing time‚ and ensure sufficient pressure․ Incorrect peeling? Let the design cool fully before attempting․ Cutting problems? Glitter HTV demands a deeper blade and higher force․
Always perform a test cut! Different vinyl thicknesses require adjustments․ If the cut doesn’t go through‚ re-cut․ Avoid unloading the mat prematurely; run the cut again if needed․ A sacrificial test piece prevents material waste during setting adjustments․
HTV Not Sticking
Addressing HTV adhesion issues often involves revisiting heat and pressure․ Ensure your heat press or iron reaches the recommended temperature for Siser Glitter HTV․ Insufficient pressure prevents proper bonding; increase it slightly․ Prolonged pressing time can also aid adhesion‚ but avoid scorching the fabric․
Verify the Teflon sheet isn’t interfering․ A clean‚ smooth surface is crucial․ Sometimes‚ fabric type impacts bonding – polyester blends work best․ Always re-press if initial adhesion seems weak‚ using firm‚ even pressure․
HTV Peeling Incorrectly
Incorrect peeling indicates temperature or timing issues․ Siser Glitter HTV typically requires a “cool peel” – letting it cool completely before removing the carrier sheet․ If it lifts with the sheet‚ repress immediately with increased time and pressure․ “Warm peels” can work‚ but risk lifting․
Ensure the HTV is fully bonded before attempting to peel․ Intricate designs benefit from slower‚ careful peeling․ If small pieces lift‚ cover with the Teflon sheet and repress those areas specifically․
Cutting Issues (Not Cutting Through‚ Cutting Too Deep)
Adjust blade depth and force for optimal cuts! Glitter HTV is thicker; increase both settings incrementally․ Start with test cuts – a tiny star is ideal – to dial in the perfect combination․ If it doesn’t cut through‚ increase force first‚ then depth․ Cutting too deep can tear the carrier sheet․
Older blades require higher settings․ Always check your machine’s blade condition․ Remember‚ different vinyl brands vary‚ so testing is crucial before a full project run․